Snipping Tool++ Review: A Free, Lightweight Snipping Tool Alternative for Windows
If the Windows native Snipping Tool feels a tad too basic for your everyday usage, Snipping Tool++ may be the easiest way to upgrade without shelling out money. This program sticks to the quick and no-frills capturing process, which you know and love, while throwing in some handy editing features for good measure and making it an actually helpful alternative for those who just need a snipping tool. Here, we’ll be taking a detailed look at what the software is capable of, its strong sides, and its weak points. If you’re in the market for some lightweight features that go just a bit further than what the Windows native tool gives without having to use an entire image editor, then this review is for you. We’ll dive into the software features, compare it to the rival software, and give you some tips on how to use it efficiently.
What Is Snipping Tool++?
Snipping Tool++ is a straightforward Windows screenshot tool with additional drawing and blurring capabilities included. This software is designed to meet the needs of those who wish for an enhanced version of the standard utility but do not require a comprehensive graphic editor. Imagine the well-known Snipping Tool with some simple instruments attached to it. Since the application is designed to be lightweight, it can easily run on an old or low-end machine. Snipping Tool launches fast, remains unobtrusive, and allows you to take screenshots and make annotations instantly. This software is great for performing daily routine tasks such as reporting bugs, saving screenshots of receipts, or explaining something to a colleague. The name should be mentioned in detail. Snipping Tool is a third-party application and not the same as Snipping Tool, which is a Microsoft product shipped with Windows.
Key Features of Snipping Tool++
This is what comes with Snipping Tool++ and how each feature helps in real life:
Snipping Tool++ vs. the Windows Snipping Tool
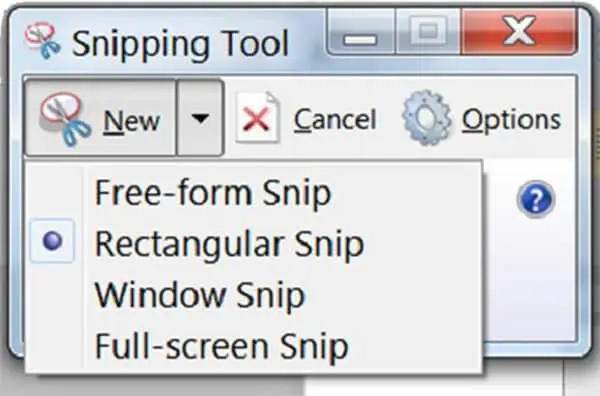
It is consistent, but its basic functionality does not provide anything more than capturing images and some markup. Moreover, there is no option to blur sensitive data. Snipping Tool++ provides all those features along with an easy-to-use interface for capturing pictures and annotating them. The main distinctions are related to annotation possibilities and the speed of using the program. First of all, in the case of using the Snipping Tool, users will have blurring, highlighting, and drawing tools together with fully customizable shortcuts, which make the process of capturing images faster. In the case of using the standard Snipping Tool, users will be provided with only some of those features and with the standard system shortcut. Moreover, neither program can record videos, so if this is the needed feature, then some other application should be used. But for taking pictures and adding necessary annotations, Snipping Tool provides more opportunities than Snipping Tool, and without any additional bulkiness.
Real-World Use Cases and Workflow Tips
The blur feature alone makes the case for holding on to Snipping Tool for many people. Customer service representatives can provide a screenshot of a customer account without revealing any sensitive information. Bloggers and educators can demonstrate the true interface without revealing their login credentials. Programmers can display the error dialog box in the ticket without revealing any internal server names. Anyone who posts screenshots in public forums, chats, or bug reports can simply blur out that single line of text that needs to be hidden. Each of these capture modes enables its own range of real-life situations. The region capture is ideal for cutting out a chart from a report, the window capture allows keeping process documentation clear and consistent, while the full screen capture allows capturing a certain moment in a second, in the way it was at that very moment.
When combined with the text and highlight capabilities, just one single screenshot becomes capable of conveying an entire instruction in the way that would normally take several lines to express. Here are a few simple tricks that will make using the application easier and more comfortable. Choose a hotkey that will be convenient for one-hand operation to avoid disrupting the work with the application when capturing something. In case you are doing process documentation, use window capture mode so that all screenshots remain the same size and without any extra elements. First, blur sensitive information before adding highlights and text annotations to avoid having to cover everything up. When making your guide, combine highlighting and typing of instructions instead of drawing something. Since the program does not consume much memory, you can have it running in the background all the time.
Pricing and Platforms
Snipping Tool++ keeps things refreshingly simple on cost and availability.
|
Detail |
Information |
|
Price |
Free |
|
Platforms |
Windows |
|
User Rating |
4.2 / 5 (user reviews) |
There are no subscriptions, trials that end after some time, or pay-to-use features. The rating of 4.2 out of 5 points indicates the program works perfectly for its main purpose, and people’s complaints are directed mostly at the features that are not included intentionally. That’s a good rating for a free utility doing its intended work.
Pros and Cons
Pros
Cons
Who Should Use Snipping Tool++?
Snipping Tool++ is ideal for all who need to take screenshots often but do not require heavy editing to accompany them. Customer support representatives, writers, teachers, and telecommuters who share quick visual snippets will find the most value in the blur option and customizable hotkeys. In addition, it is highly recommended for all users with outdated laptops or PCs because the Snipping Tool does not require too many computing resources. However, for those who require creating video walkthroughs, editing images in layers, or frequently receiving new features, there are better snipping tool alternatives. But for simple capturing and annotation, Snipping Tool is just perfect, and the cost makes trying this software easy.
Final Verdict
The Snipping Tool++ software lives up to its reputation since it adds some functionality to a regular Windows capture utility, which is needed, while being lightweight and free. The blur feature, versatile modes for capturing the screen, and the ability to assign hotkeys make this product stand out. Of course, Snipping Tool is not supposed to become a replacement for professional photo editors or screen recorders, but it can be useful under certain circumstances. As an addition to the standard Windows utility, it deserves attention.